Zoho Mail can be configured to route outbound mail through Paubox, to take advantage of Paubox's email encryption. Follow the steps below to integrate Paubox with Zoho Mail.
What you’ll need:
- A subscription with Paubox (don't have one? sign up here)
- A Zoho Mail account and access to the Zoho Mail Admin Console
- Domain: Admin access to your organization's domain host (for ex. GoDaddy or Cloudflare)
Step-by-step guide
Part 1: Your domain - update your records
- Log in to your domain host
- Click on the Control Panel (may also be called DNS Zone Editor, or just DNS)
- If you see a record of type TXT with a value similar to: v=spf1 include:one.zoho.com -all
- Edit the record and insert "include:_spf.paubox.com" just before the -all; for example:
v=spf1 include:one.zoho.com include:_spf.paubox.com -all - Note: there may be other "includes" or IP numbers in the record, that is fine, just insert the "include:_spf.paubox.com" right before the -all
- Note: an existing SPF record may end in "~all" ... change to "-all" for better email security
- Click Save
- Edit the record and insert "include:_spf.paubox.com" just before the -all; for example:
- If you do not see a record of type TXT that starts with v=spf1, create a new one:
- In the Records section, click Add (may also be called Add Record)
- For Type, enter TXT
- In the Host field, type: @ (if it does not accept the @ symbol, enter your domain)
- In the TXT value or Text field, type this line:
v=spf1 include:one.zoho.com include:_spf.paubox.com -all
- Leave the default value in the TTL field
- Click Save
Part 2: Configure email routing in Zoho Mail
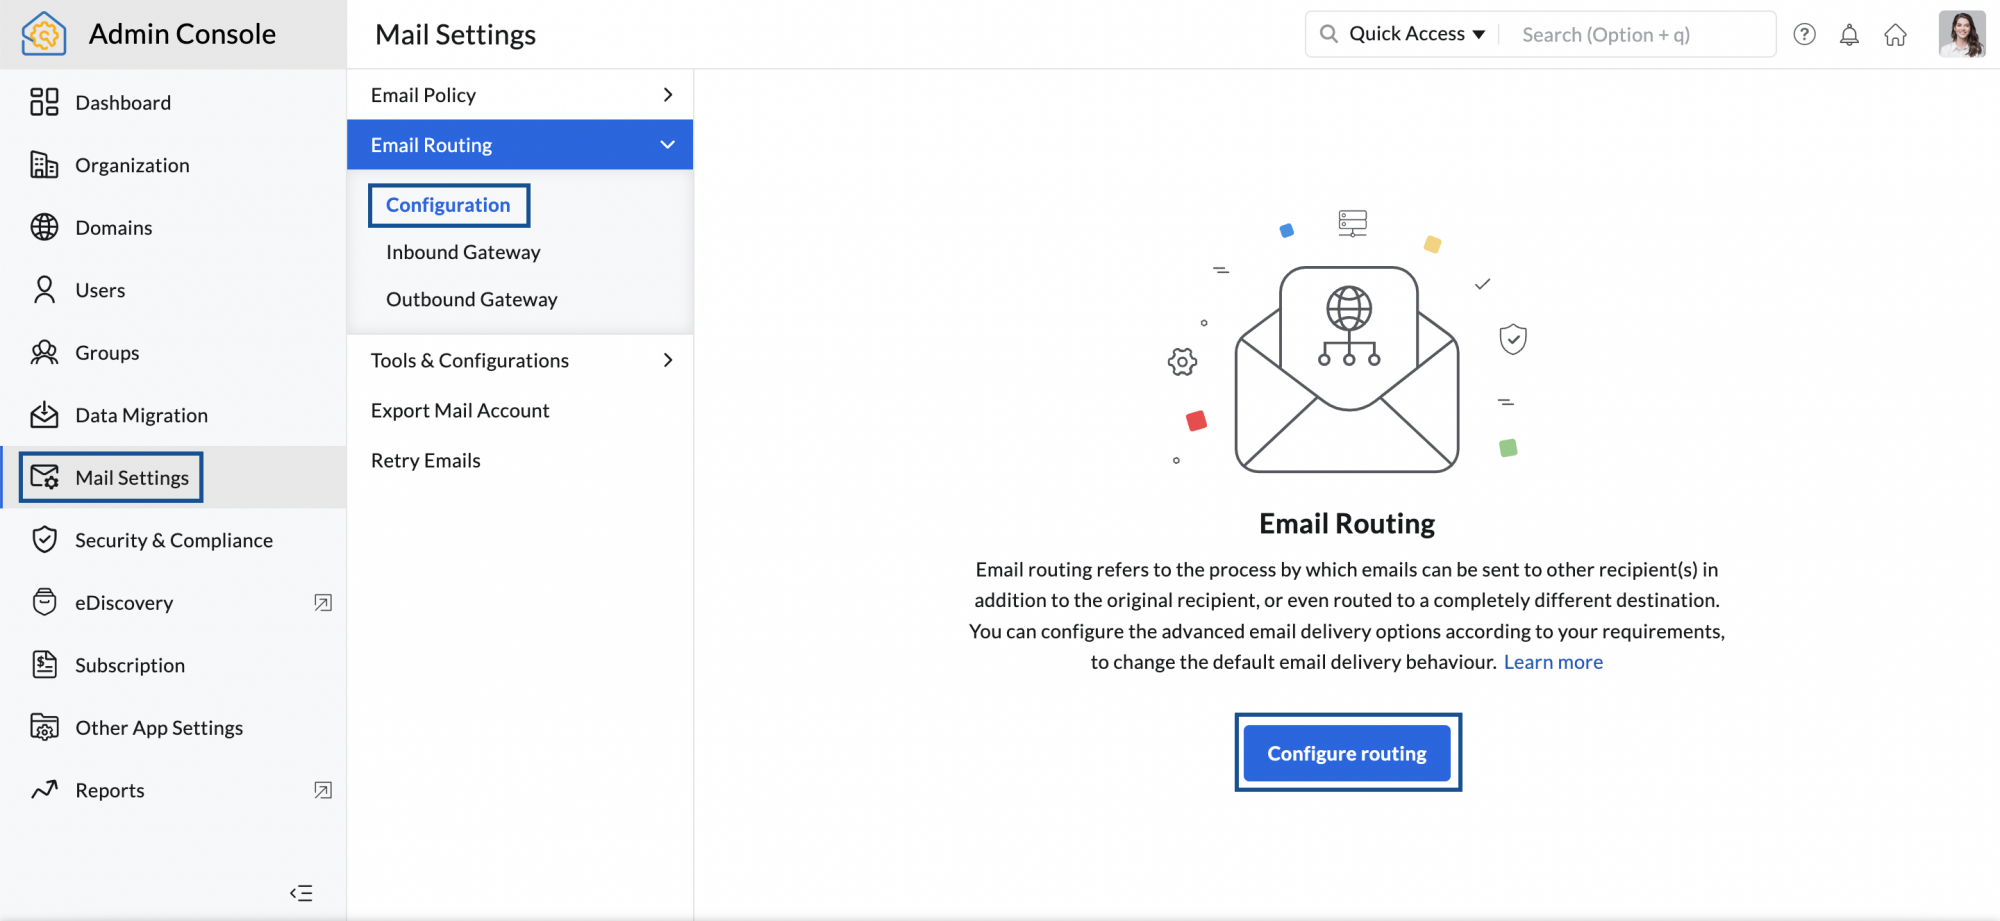
- Log in to Zoho Mail Admin Console
- Navigate to Mail Settings and go to Email Routing
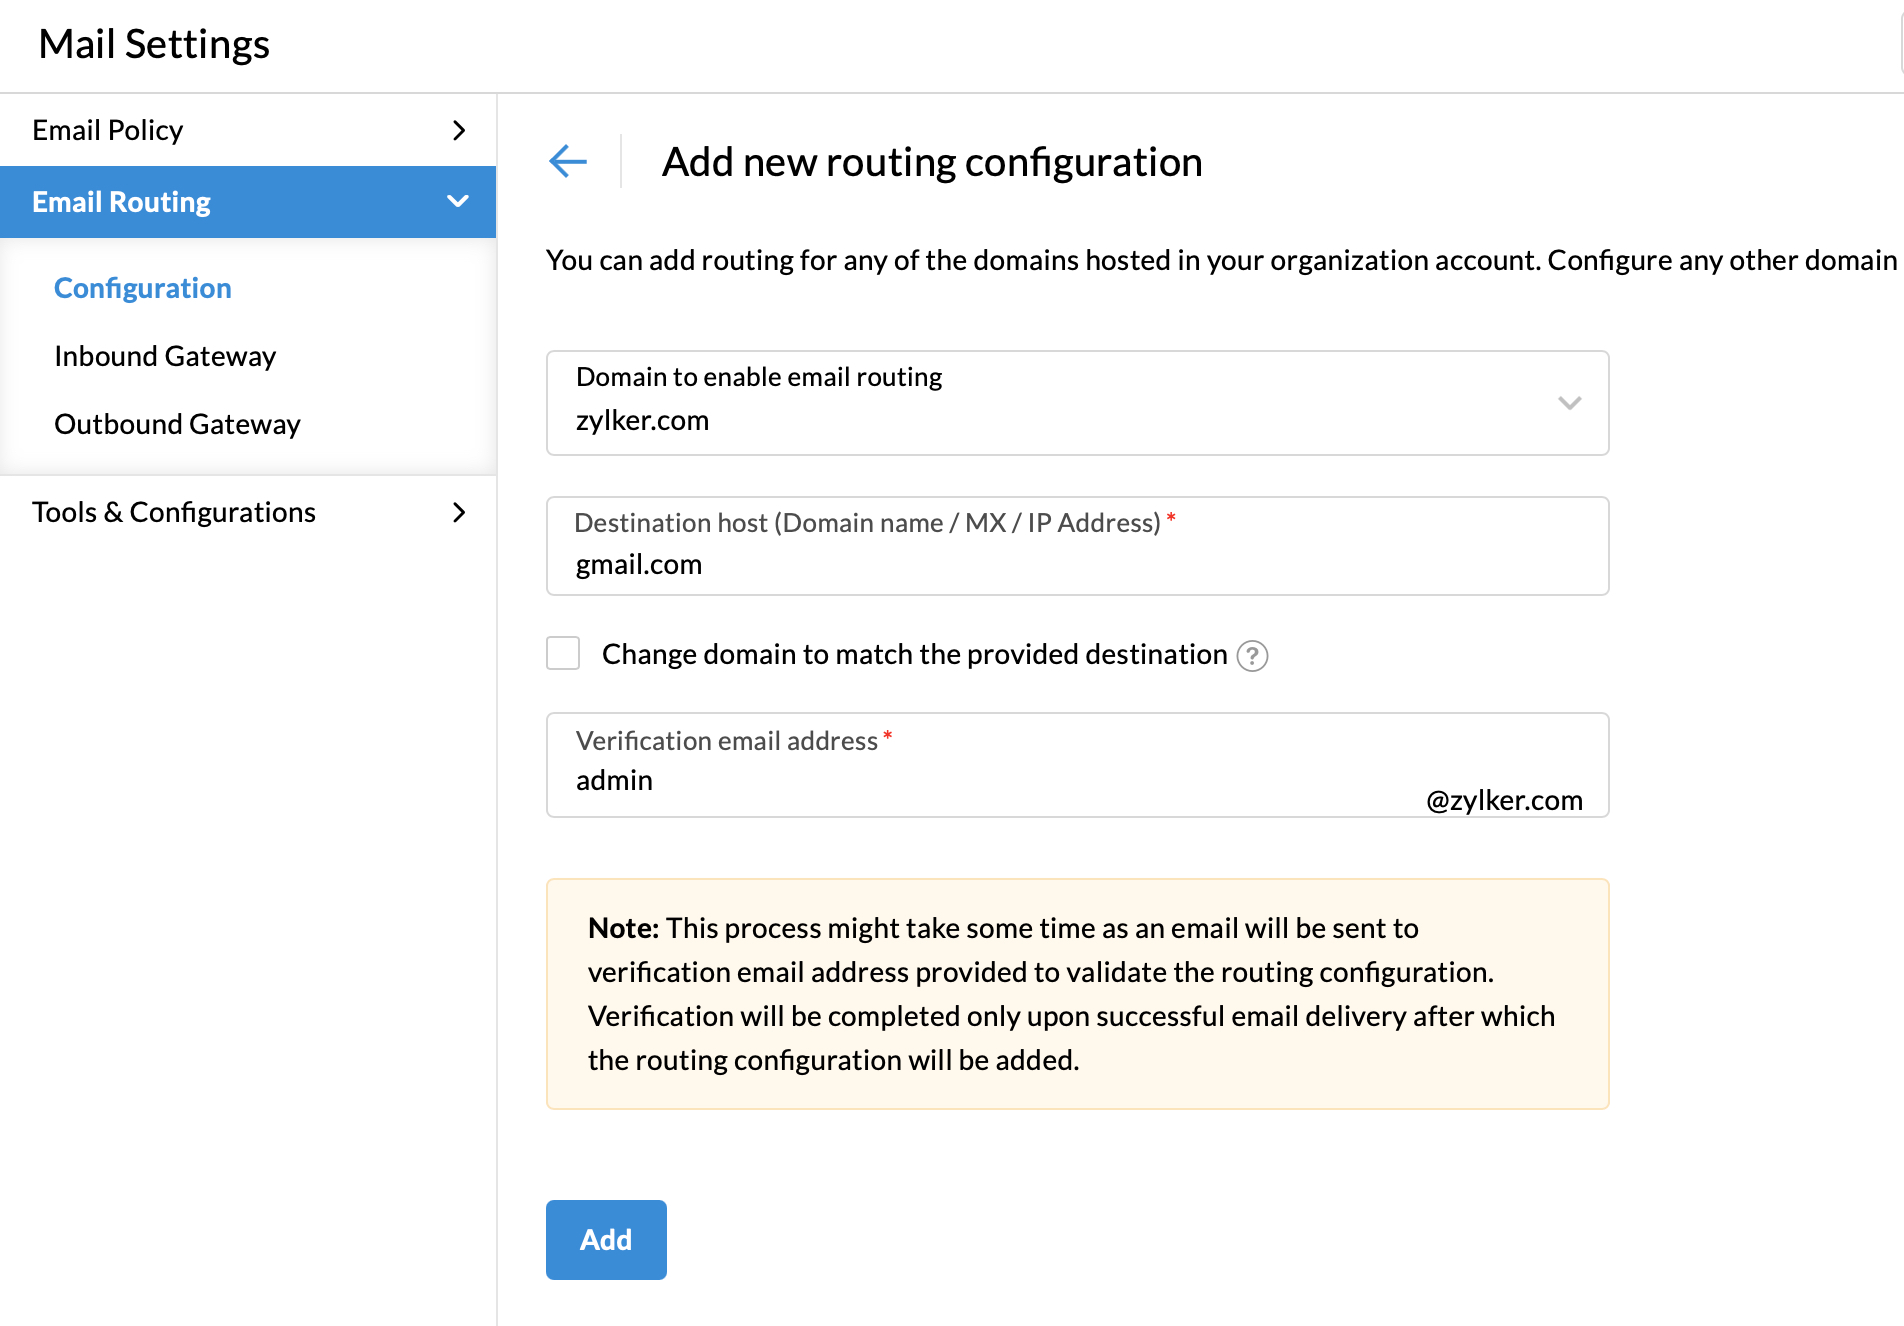
- In the Email Routing section, click Configure routing or Add
- Select the domain for which you want to enable Routing from the drop-down list
- In the Destination host field, enter the value provided by Paubox during setup
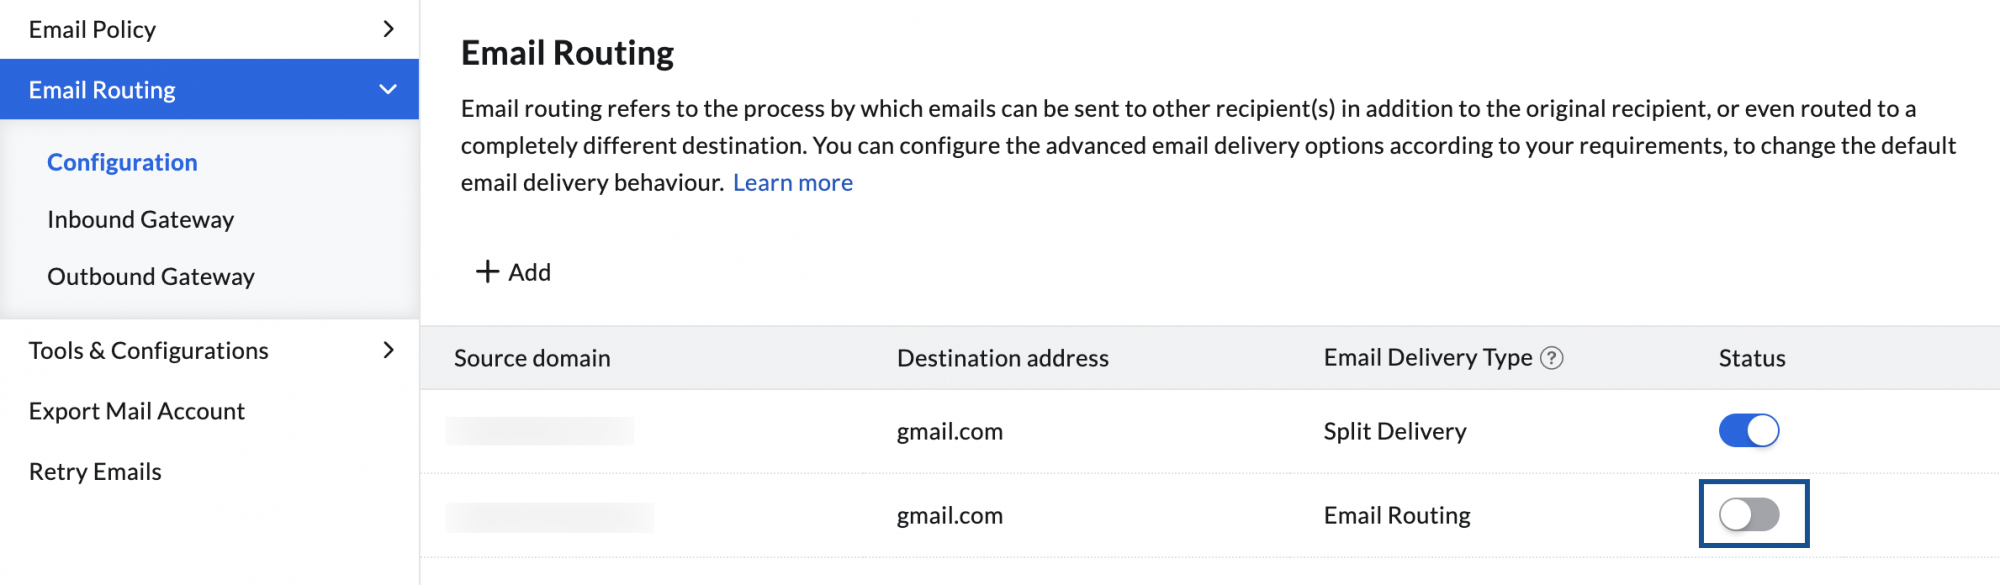
When you add configurations for email routing, it's set at the disabled condition by default. To Enable or Disable your routing configuration, follow these steps:
- Navigate to Mail Settings in the left pane and go to Email Routing
- Next to the routing configuration, enable by toggling the Status
Part 3: Paubox dashboard - upload logo
- Navigate to the Paubox dashboard (https://www.paubox.com & "Sign In")
- Log in with your email address and password (not sure? click "Forgot your password?")
- Click on your profile in the bottom left to access "Account Settings" and then upload your organization's logo in Secure Contact Form settings
Part 4: Test email
Sending a test email
- Log in to your Zoho Mail account
- Compose a new email to: paubox15@gmail.com with the subject: Test
- Enter anything you like in the message body, and click Send
Paubox will review the email to ensure proper setup.